How To Setup Sim Racing Cockpit: Beginner’s Guide
Introduction
Setting up a sim racing cockpit correctly is essential for both novice and seasoned racers. A well-assembled cockpit not only enhances comfort but also significantly boosts immersion and ultimately improves lap times. This guide is designed for anyone interested in sim racing, whether you are just beginning, have some experience, or are competing at advanced levels.
What Is a Sim Racing Cockpit?
A sim racing cockpit is a specialized setup designed to replicate the experience of driving a real car. These cockpits typically include several core components that work together to provide an immersive racing experience. Here’s a quick overview of the essential parts:
- Frame: The structure that supports all other components.
- Racing Seat: Provides comfort and support during long sessions.
- Wheel Mount: Holds the steering wheel securely in place.
- Pedal Plate: A surface for mounting the pedals.
- Shifter/Handbrake Mounts: Additional mounts for gear shifting and handbrake functionality.
There are different styles of cockpits to consider:
- Foldable Cockpit: Space-saving and portable.
- Tubular Steel Cockpit: Sturdy and durable.
- Aluminum Profile Rig: Highly customizable and adjustable.
Planning Your Sim Racing Cockpit Setup
Before diving into assembly, careful planning is crucial. Consider the following factors:
- Measuring Available Space: Ensure you have enough room for your cockpit and racing equipment.
- Choosing Cockpit Type: Select a cockpit type that fits your space and needs.
- Budget Planning: Determine how much you are willing to spend, including future upgrades.
- Fixed vs. Adjustable Setups: Decide if you want a setup that can adapt to different drivers or one that is fixed in place.
Step 1: Assembling the Cockpit Frame
Start by following the manufacturer’s instructions closely. Proper assembly is vital for stability and safety:
- Ensure frame alignment and squareness to avoid any instability.
- Tighten all bolts correctly, checking for firmness.
- Conduct stability checks before mounting any hardware.
Step 2: Installing and Adjusting the Racing Seat
The racing seat should be positioned to provide comfort and support:
- Adjust the seat height and angle for optimal viewing and comfort.
- Ensure the seat distance from the pedals allows for a comfortable reach.
- Consider lumbar and back support to avoid fatigue.
- Choose between fixed or sliding seat rails based on your preference.
Step 3: Mounting the Steering Wheel
Proper steering wheel positioning is crucial for effective control:
- Choose the correct mounting height for the wheel.
- Set the wheel distance from your chest to ensure comfort.
- Adjust the wheel angle for optimal hand positioning.
- Maintain a proper arm bend with hands at the 9 and 3 o’clock positions.
Step 4: Installing and Positioning the Pedals
Pedal setup can affect your overall performance significantly:
- Ensure the pedals are at a comfortable distance and aligned with the seat.
- Adjust the pedal angle and inclination for better foot comfort.
- Consider heel support for effective pedal use.
- Position load cell pedals appropriately for accurate responses.
Step 5: Mounting Shifter and Handbrake
Correct positioning of the shifter and handbrake enhances usability:
- Position the shifter at a comfortable height and reachable distance.
- Adjust the handbrake for rally or drift styles based on your preference.
- Consider right-hand vs. left-hand mounting for ergonomic consistency.
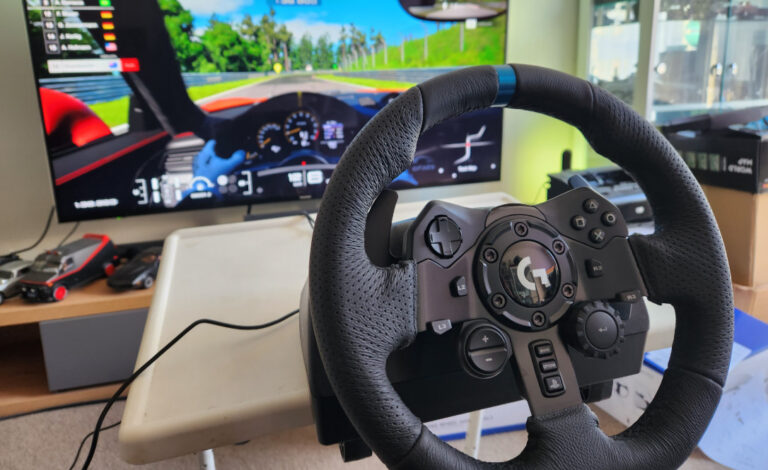
Step 6: Monitor and Display Setup
Your display can greatly impact your racing experience:
- Choose between a single monitor or triple monitors for a wider field of view.
- Set the monitor height relative to your eye level for comfort.
- Maintain an appropriate screen distance for clear visibility.
- Understand field of view (FOV) basics for an immersive experience.
- Consider VR headset options for an even more engaging setup.
Step 7: Cable Management and Power Setup
Well-organized cables can prevent accidents and tangles:
- Organize cables for safety and a clean appearance.
- Secure USB and power cables to prevent strain during movement.
- Utilize cable trays and ties to keep everything tidy.
Step 8: Software Configuration and Calibration
Ensure your equipment functions correctly with proper software setup:
- Install all necessary drivers and firmware for hardware.
- Calibrate wheel rotation and pedal sensitivity.
- Review in-game settings for popular titles like Assetto Corsa, iRacing, ACC, and F1.
Ergonomics and Comfort Optimization
Long racing sessions can be taxing without proper ergonomics:
- Maintain a correct seating posture to avoid fatigue.
- Adjust the cockpit for different drivers if applicable.
- Avoid common ergonomic mistakes that can lead to discomfort.
Testing and Fine-Tuning Your Setup
After setup, testing is essential to ensure everything is functioning as intended:
- Conduct a first test drive checklist to identify any issues.
- Look for flex or movement in the setup during testing.
- Make micro-adjustments based on your experience.
- Save hardware and game profiles for future sessions.
Common Setup Mistakes to Avoid
Be mindful of common pitfalls that can hinder your experience:
- A wheel mounted too high or too far can affect control.
- Pedals placed too close or too flat can lead to discomfort.
- Poor monitor positioning can disrupt immersion.
- Ignoring ergonomics may lead to fatigue.
Beginner vs Advanced Cockpit Setup Tips
Different levels of experience call for different setups:
- Basic setups for entry-level cockpits should focus on comfort and functionality.
- Advanced setups, like aluminum profile rigs, allow for more customization.
- Consider motion rigs for an enhanced experience.
- High-torque direct drive wheel adjustments might be necessary for competitive racers.
Maintenance and Long-Term Adjustments
Long-term upkeep is important for a consistent racing experience:
- Re-tighten bolts over time to maintain stability.
- Regular cleaning and upkeep will prolong the life of your equipment.
- Adapt your setup as your skills improve and needs change.
- Prepare for hardware upgrades as technology evolves.
FAQ
Here are some frequently asked questions regarding sim racing cockpit setups:
- How long does it take to set up a sim racing cockpit? The time varies, but most setups can be completed in a few hours.
- What is the ideal seating position for sim racing? The ideal position allows for a slight bend in the knees and elbows, with your feet comfortably reaching the pedals.
- Can beginners set up a sim racing cockpit alone? Yes, with proper guidance and tools, beginners can assemble their cockpits independently.
- How much space do I need for a sim racing cockpit? Ideally, you should have at least 6 feet by 6 feet of space for a comfortable setup.
- Do I need a cockpit for direct drive wheels? While not strictly necessary, a sturdy cockpit enhances performance and comfort.
Conclusion
Setting up a sim racing cockpit correctly is crucial for achieving an optimal racing experience. By following this guide, you can ensure that your setup is tailored to your needs, enhancing both comfort and performance. Remember to personalize your cockpit to make it uniquely yours, and don’t hesitate to make adjustments as you grow in your sim racing journey. Happy racing!

My name is Michael “Mick” Carter, and I’m a dedicated sim racing enthusiast with a deep love for motorsport. I first discovered sim racing in 2015 when a friend introduced me to a Logitech G27 and Assetto Corsa—an experience that immediately hooked me. Since then, I’ve gone from basic gear to advanced direct drive setups, VR headsets, and custom racing rigs, constantly refining my driving technique and equipment.
I mainly race in iRacing, ACC, and rFactor 2, focusing on GT3 endurance and open-wheel events. I’m not a professional driver—I’m simply someone who enjoys the craft of racing: learning car behavior, improving lap times, and battling for position with respect and skill.
I share what I’ve learned so others can build setups they enjoy and grow their own passion for sim racing. For me, the joy is in improving, one race at a time.
Owner at SimRacingCockpits.Com